If you develop a sophisticated image for a customer (for example, a website template), it would be wise to properly protect it before you send it to the customer. Sending a reduced copy of the image, as well as adding a logo to the image, is a bad idea. What you need is serious protection of all image parts – smaller as well as larger ones. What you can do is fill the image with some text (for example, "sample sample sample"). This action is really very different from equipping your file with a simple logo. The logo is a good solution for a copyrighted image, while the image you’ve just created is not protected by law yet, and hence cannot be called "yours". If you don’t get paid for the image, chances are great that you won’t be able to prove anything. On the other hand, if the whole image is covered with protection text, the customer will prefer paying for the original image to trying to erase the text from your image. So, providing your images with such a text is a good way of protecting them. Image Converter Plus will help you provide all your images with protection texts at once.
Do the following:
Step 1:
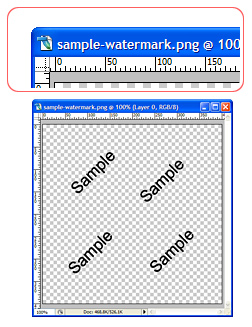
- First, create a graphics file with transparent background and type protection word (for example "sample sample sample") all over the image. The size of this file should correspond to that of your largest image.

Step 2:
- Launch Image Converter Plus.
Step 3:
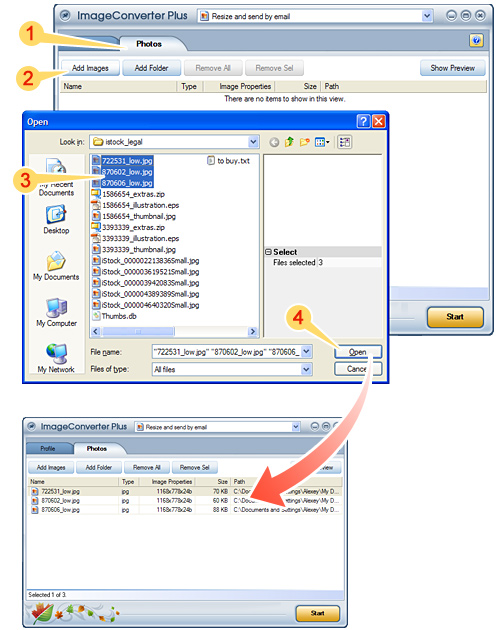
- Go to "Photos" tab, select and add files you want to process.

Step 4:
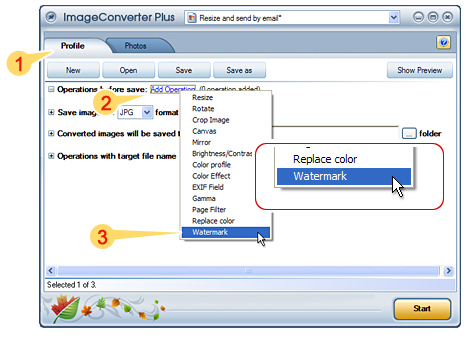
- Click "Add operation" and select "Watermark" from the menu.

Step 5:
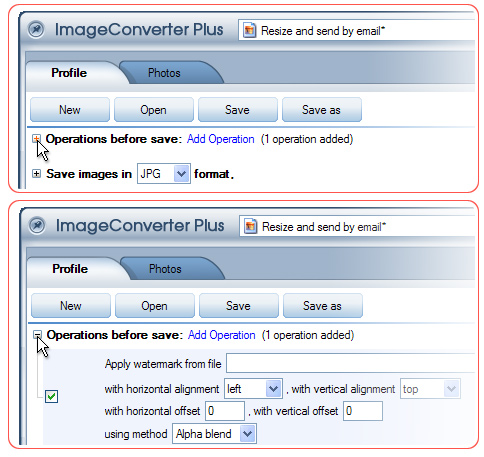
- Click "+" mark located to the left from "Add operation" line to open the group of settings for added operations.

Step 6:
- In "Watermark", specify the file you want to use in "Apply watermark from file" line.
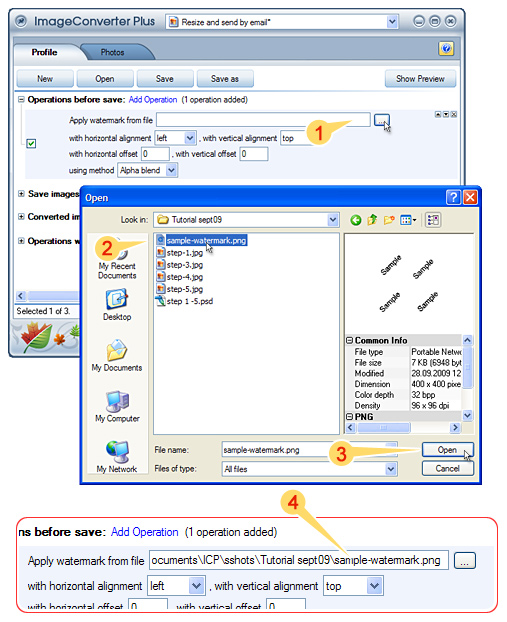

Step 7:
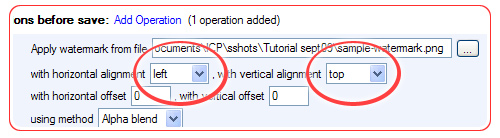
- In "with horizontal alignment: with vertical alignment: "line, select values "left" and "top".

Step 8:
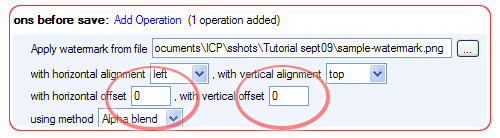
- In "with horizontal offset: with vertical offset: "line, enter "0" and "0" values.

Step 9:
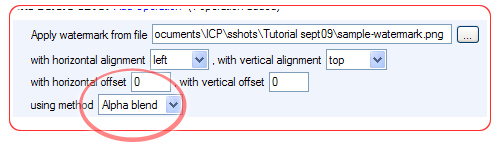
- In "Using Method" line, select "Alpha blend".

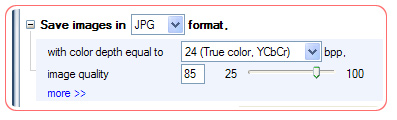
Step 10:
- Specify settings for the destination file format (optimal values are specified by default).

Step 11:
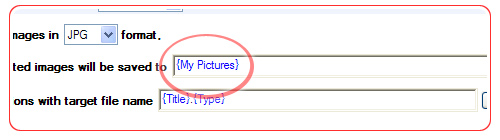
- Specify the folder to save converted images to.

Step 12:
- Specify other settings.
Step 13:
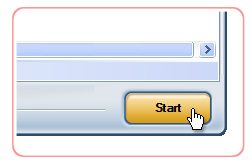
- Press "Start" button to start conversion.

Result:

